How to Enable MFA for Office 365 users?
Set up Multi-Factor Authentication for Office 365 Users
- Go to the Office 365 Admin Center.
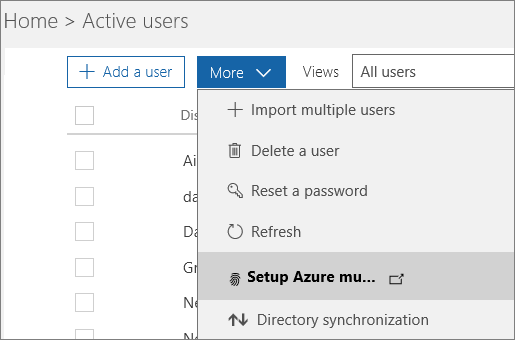
- Go to Users > Active users.
- Choose More > Setup Azure multi-factor auth.
- Find the people for whom you want to enable MFA. In order to see everyone, you might need to change the Multi-Factor Auth status view at the top.
The views have the following values, based on the MFA state of the users:
- Any - Displays all users. This is the default state.
- Enabled - The person has been enrolled in MFA, but has not completed the registration process. They will be prompted to complete the process the next time they sign in.
- Enforced - The person may or may not have completed registration. If they have completed the registration process, then they are using MFA. Otherwise, they will be prompted to complete the process the next time they sign in.
- Select the check box next to the people for whom you want to enable MFA.
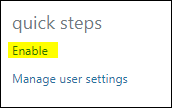
- On the right, under quick steps, you'll see Enable and Manage user settings. Choose Enable.
- In the dialog box that opens, choose enable multi-factor auth.

Reference Link:
Last updated on