How to Create Azure Recovery Service Vault?
Create a Recovery Services Vault:
- If you haven't already done so, sign in to the Azure portal using your Azure subscription.
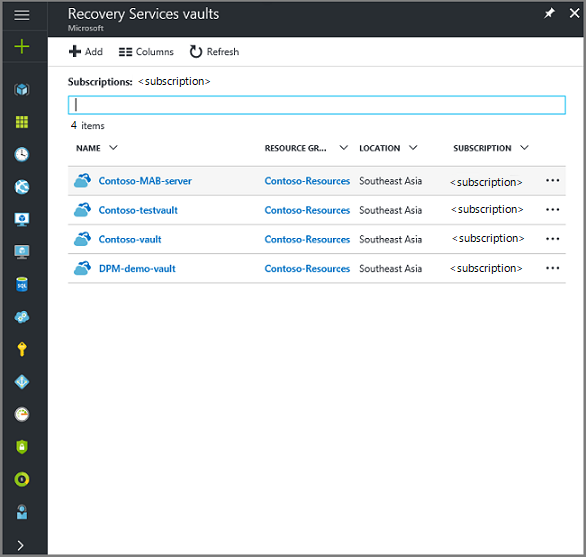
- On the Hub menu, click All services and in the Filter dialog type Recovery Services. As you type, the list of resources filters. When you see Recovery Services vaults in the list, click it.

If there are Recovery Services vaults in the subscription, the vaults are listed.

- On the Recovery Services vaults menu, click Add.

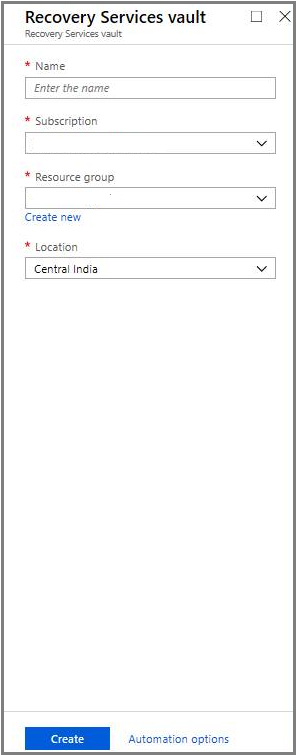
The Recovery Services vault menu opens, prompting you to provide a Name, Subscription, Resource group, and Location.

- For Name, enter a friendly name to identify the vault. The name needs to be unique for the Azure subscription. Type a name that contains between 2 and 50 characters. It must start with a letter, and can contain only letters, numbers, and hyphens.
- In the Subscription section, use the drop-down menu to choose the Azure subscription.
- In the Resource group section:
- select Create new if you want to create a Resource group. Or
- select Use existing and click the drop-down menu to see the available list of Resource groups.
For complete information on Resource groups, see the Azure Resource Manager overview.
- Click Location to select the geographic region for the vault. This choice determines the geographic region where your backup data is sent.
- At the bottom of the Recovery Services vault menu, click Create.
It can take several minutes for the Recovery Services vault to be created. Monitor the status notifications in the upper right-hand area of the portal. Once your vault is created, it appears in the list of Recovery Services vaults. If after several minutes you don't see your vault, click Refresh.

