How to Add Custom Domain in WebApp in Azure
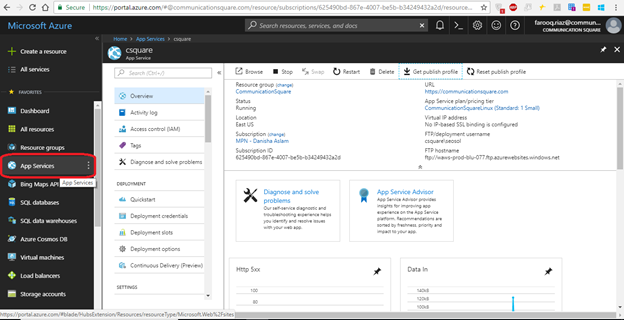
- Navigate to portal.azure.com and click on App Services:
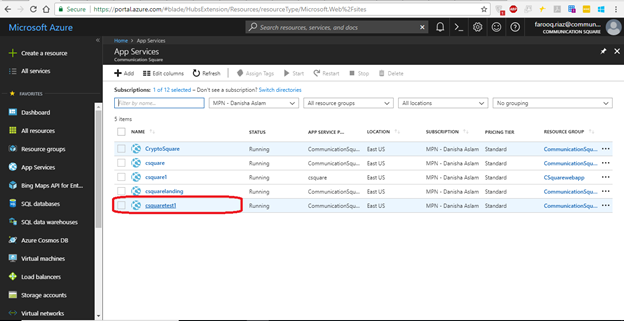
- Now click on your WebApp in which you want to add custom domain:
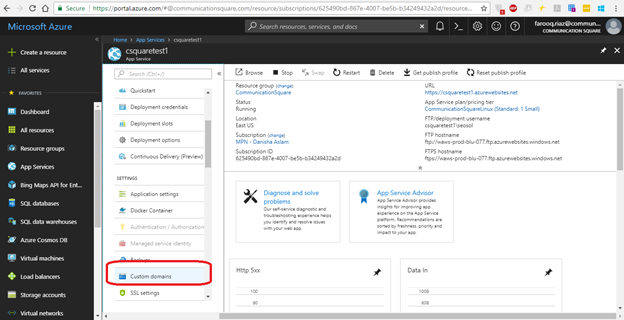
- Now select Custom Domain from left pane :
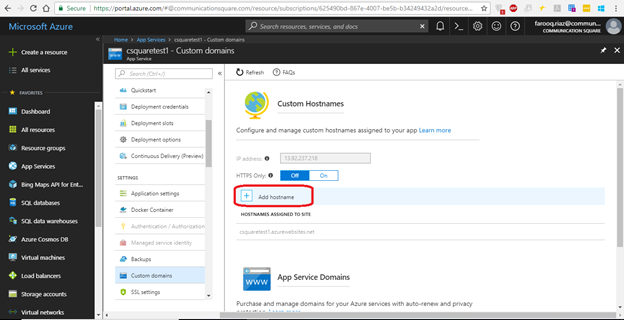
- Now click on Add Hostname:
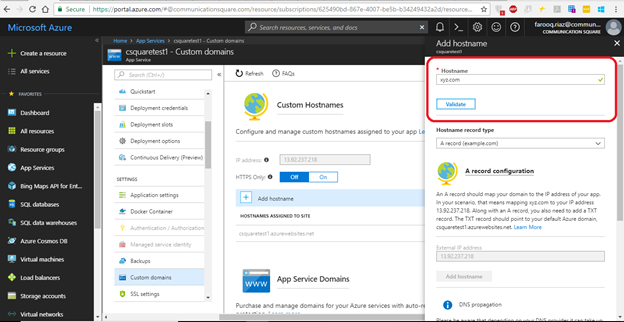
- Put the Hostname and click on Validate:
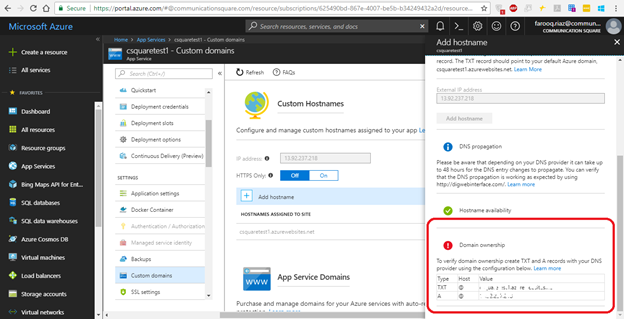
- It will now ask for verifying domain ownership you need to add the Records with your DNS provider and then again click on Validate:
Last updated on