
Azure Virtual Desktop Guide
- 1. Login into Azure portal
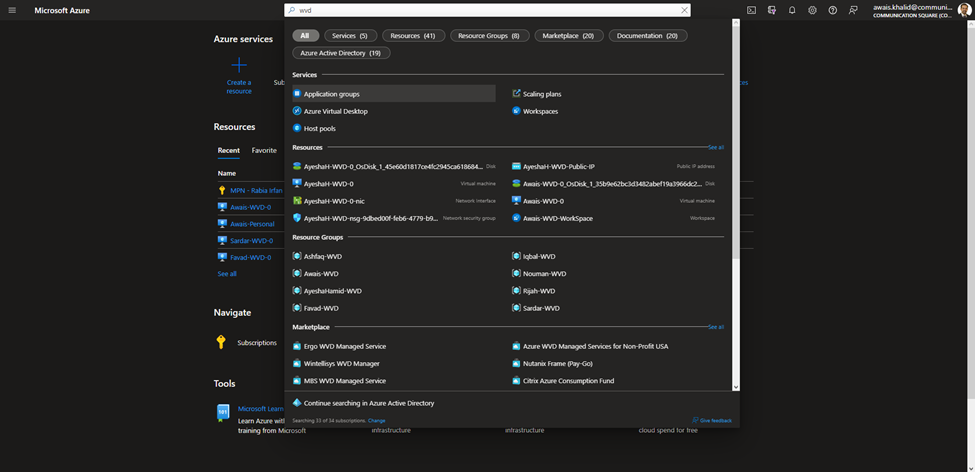
- 2. Search for WVD and click on Azure Virtual Desktop
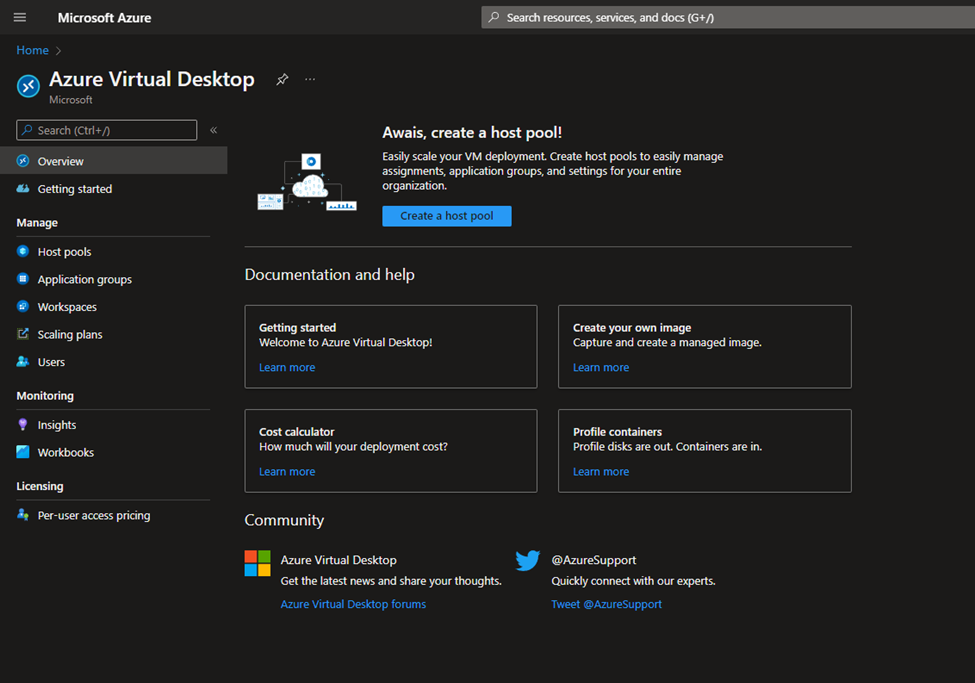
- 3. Click on Create Host Pool
- 4. Select the Subscription of the New User
- 5. Resource group should be User-WVD i.e., in this case Rabia-WVD, Hostpool name should be User-HostPool, location should be East US and Host pool type Personal.
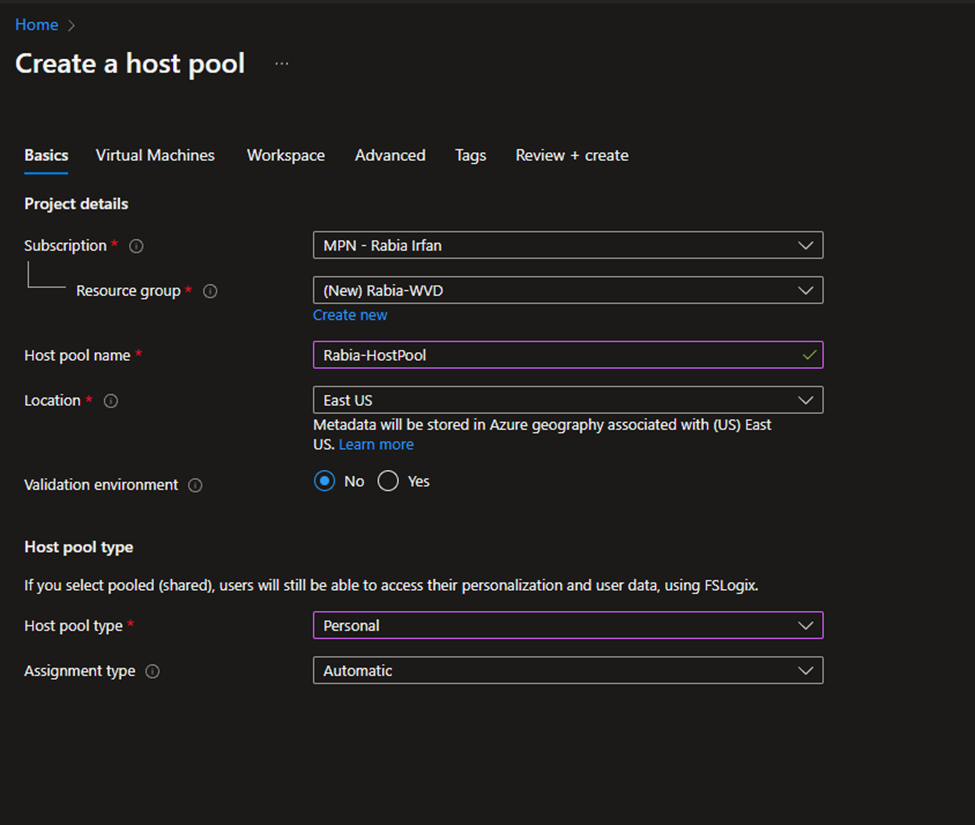
- 6. Click on Next
- 7. Name Prefix should be User-WVD, select other options as shown in the SS
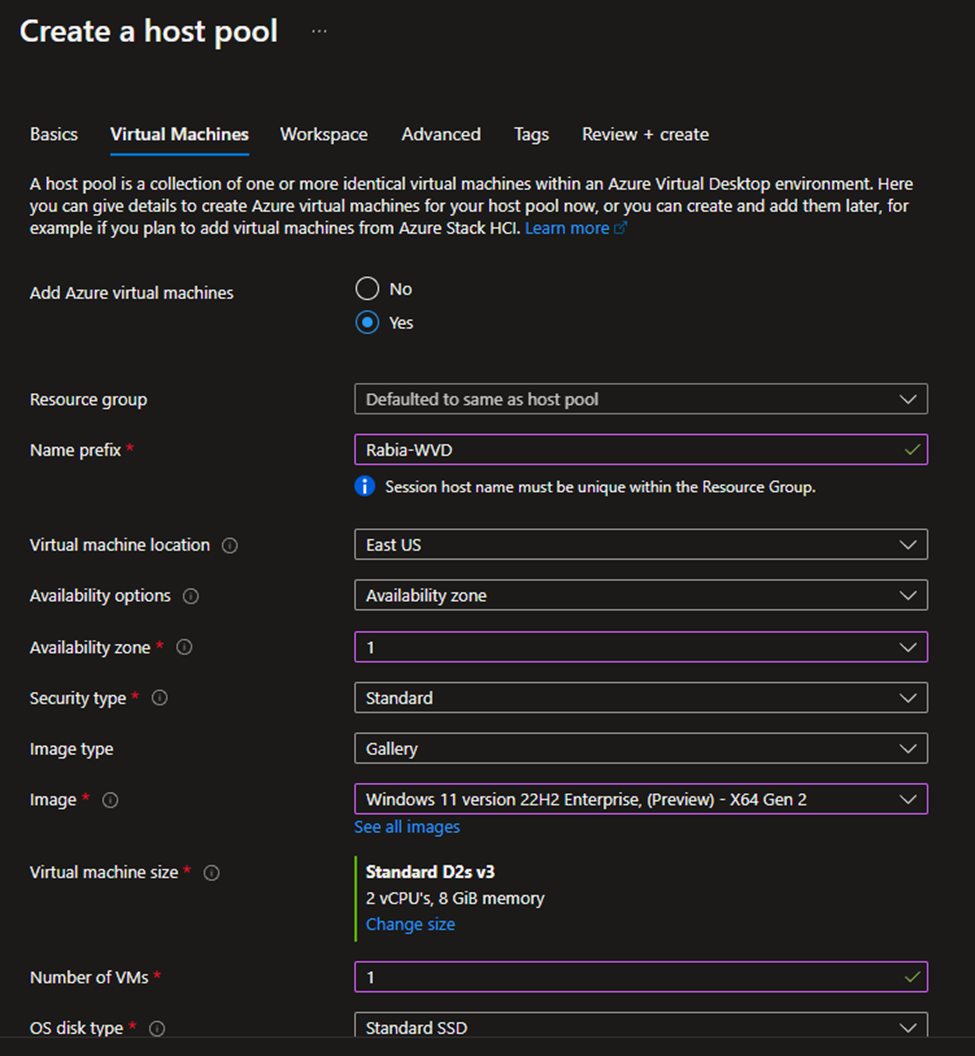
- 8. Select the VN you have created

- 9. Click on Next and Select Create New Workspace, Workspace Name Should be User-WVD-Workspace
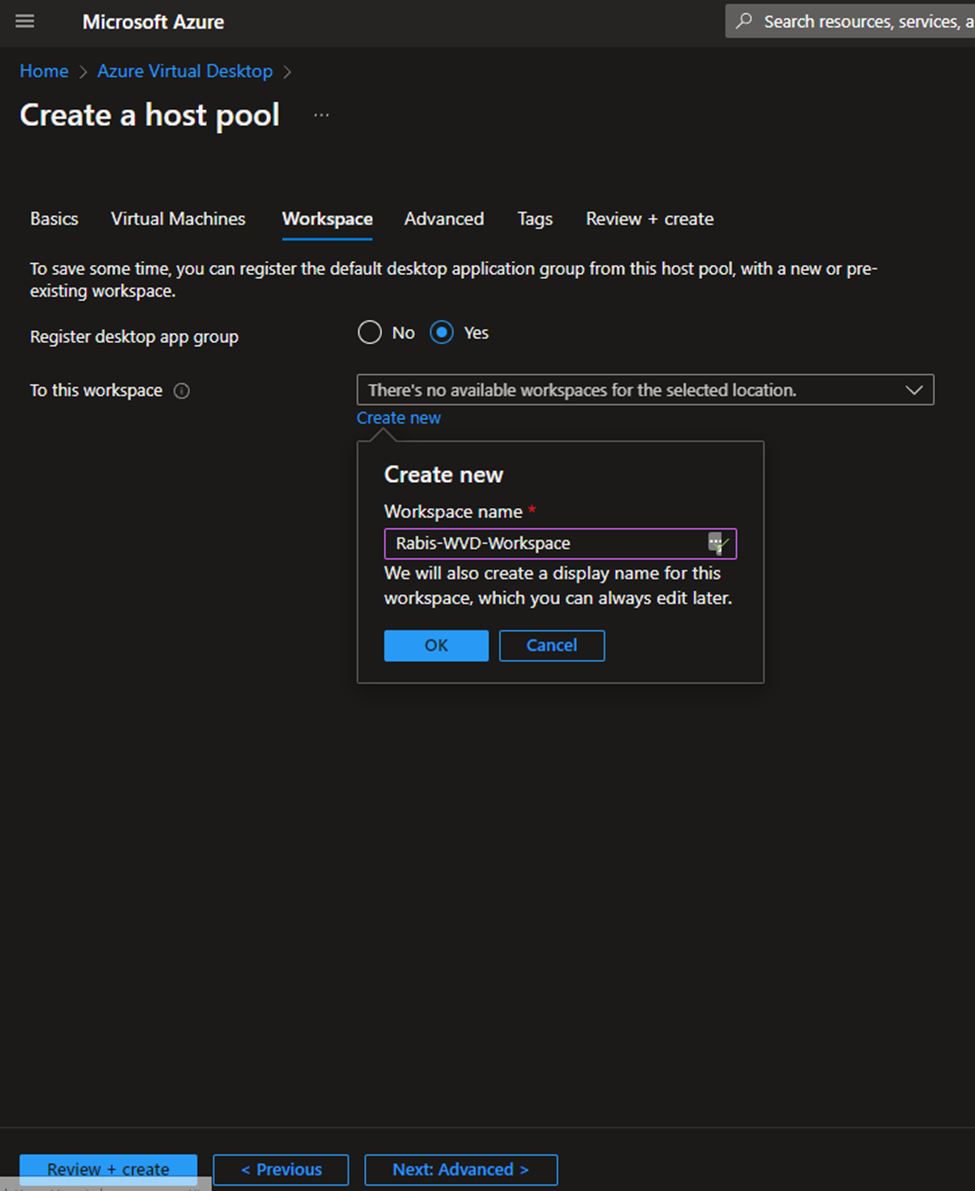
- 10. Select Ok and Click on Review and Create
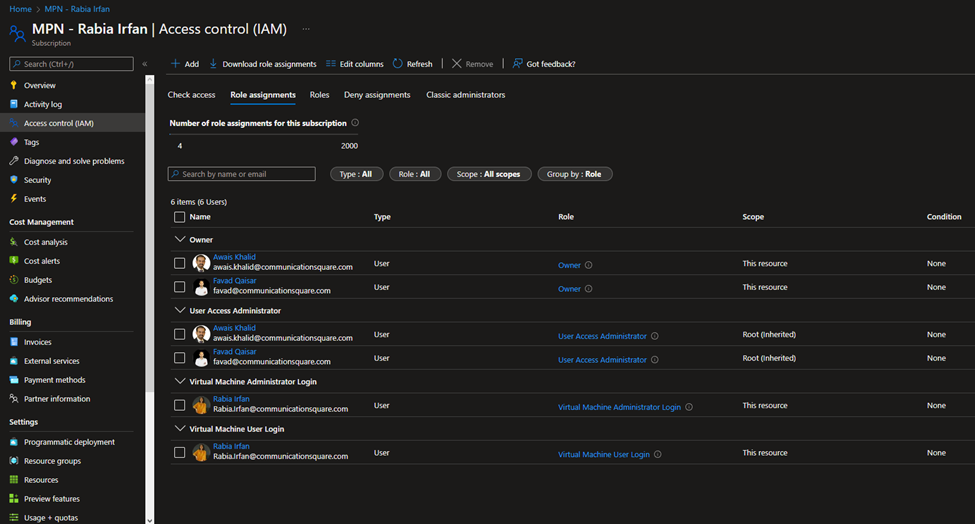
- 11. Go to Subscription and Click on IAM and add role assignment Virtual Machine User Login and Virtual Machine Administrator Login and assign both roles to new user.
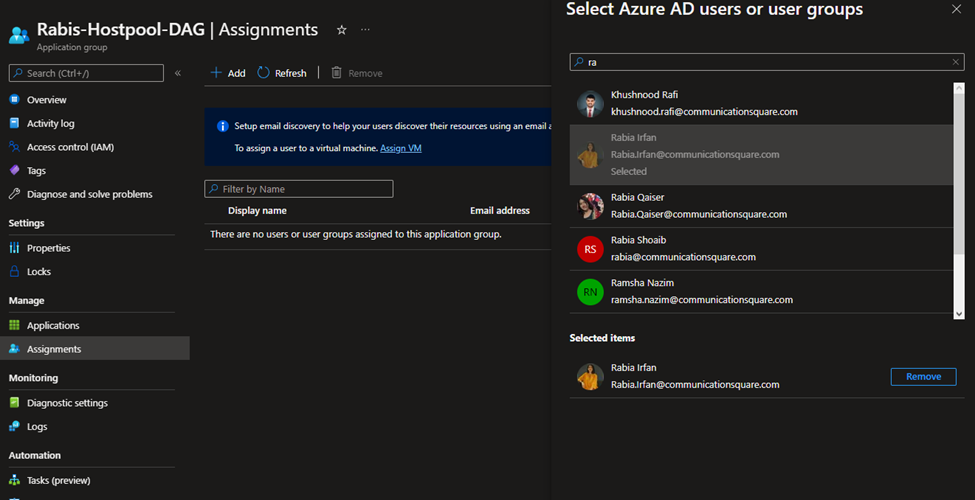
- 12. Assign User to Application Group
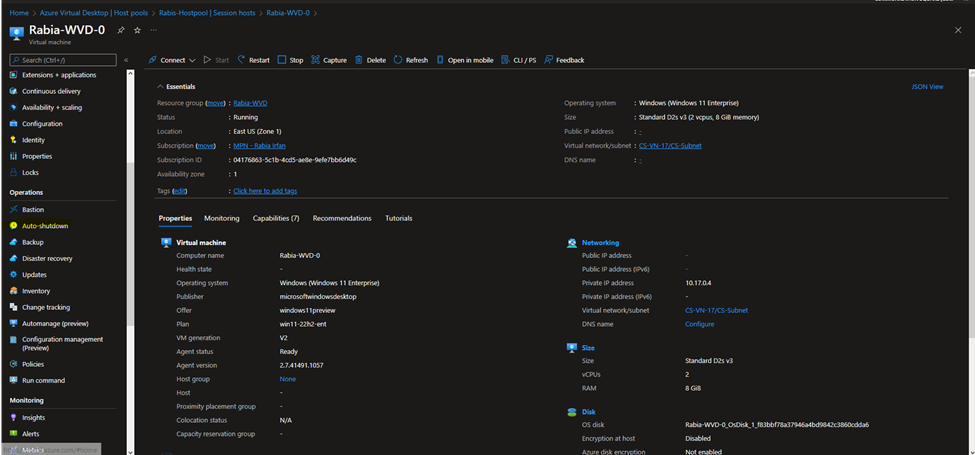
- 13. Rename the Session Host

- 14. Assign User to VM

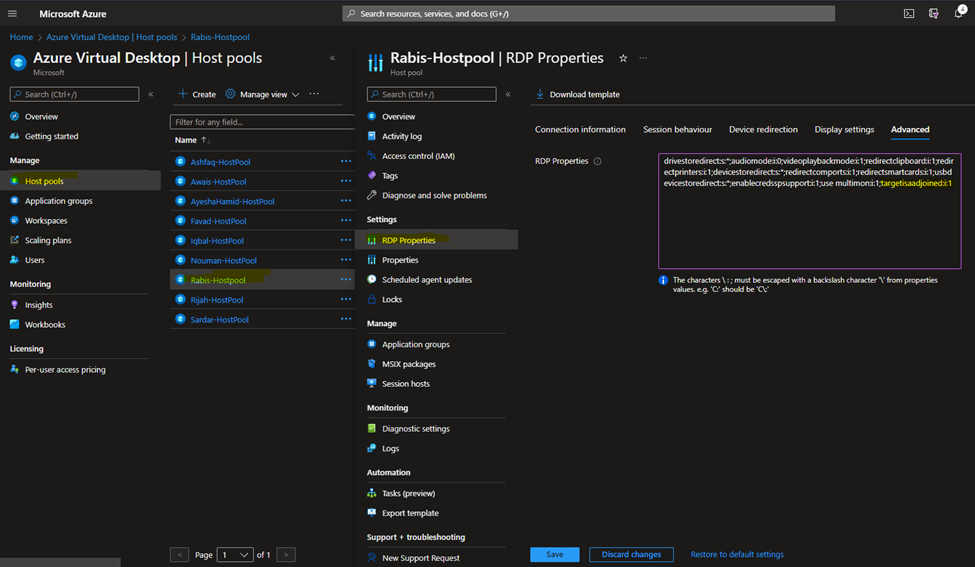
- 15. Modify RDP Properties including the mandatory attribute in advanced for permitting connections from WVd targetisaadjoined:i:1
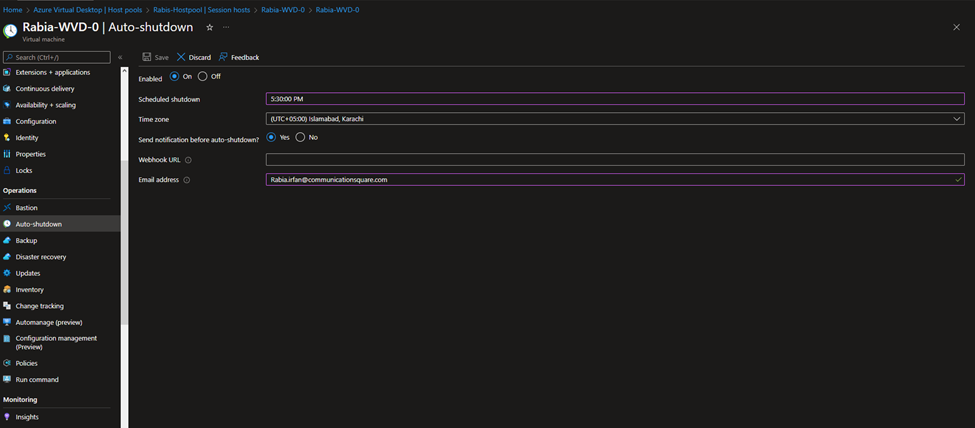
- 16. Add auto shutdown
- 17. Click save


